
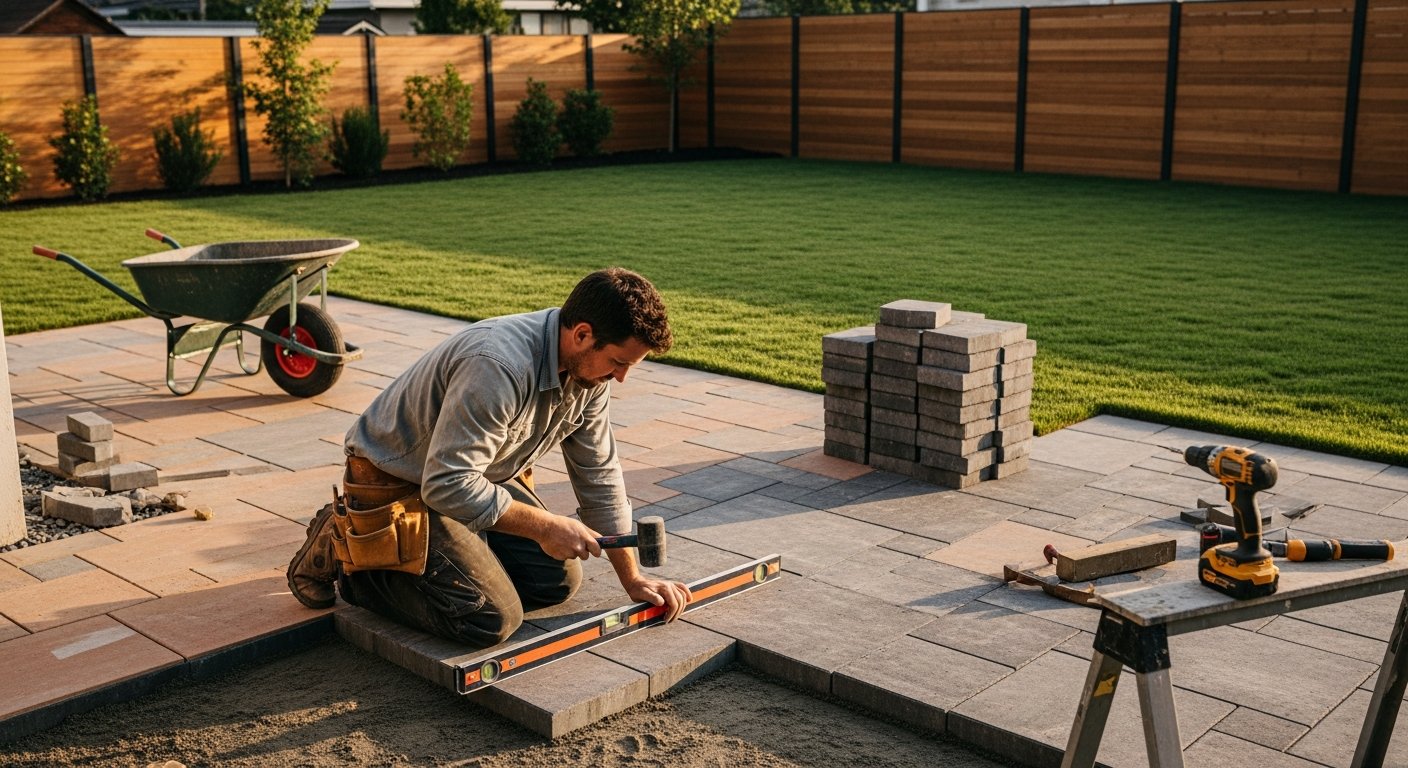
Patio Installation: Costs, Materials, and Pro Tips
Learn how to plan a patio installation that fits your budget, from material choices to hiring a contractor, and get free estimates from local pros.
Learn more about Patio Remodel or Addition for guides, costs, and what to expect.
Compare Patio Remodel or Addition Pros Near You

Enter your ZIP code to compare top-rated local professionals and request free quotes.
Your backyard has the potential to become your favorite room in the house, but turning it into a functional outdoor living space usually starts with one major decision: the patio. A well-designed patio adds real square footage to your home, increases its resale value, and gives you a dedicated spot for grilling, dining, or simply relaxing. However, the process of planning and executing a patio installation can feel overwhelming, especially when you are trying to balance your vision with your budget. The good news is that with the right approach and the right professionals, you can achieve a beautiful result without the stress.
This guide will walk you through every stage of patio installation, from initial design and material selection to hiring a contractor and managing the project. Whether you are replacing an old, cracked concrete slab or starting from scratch in a bare yard, you will find practical advice to keep your project on track. We will also show you how to get free estimates from local pros through BuySellRemodel, so you can compare prices and make an informed decision with confidence.
Why Patio Installation Is a Smart Home Investment
A patio is more than just a flat surface; it is an extension of your living space. According to the National Association of Realtors, outdoor living projects consistently rank among the top home improvements for return on investment. Homebuyers are drawn to properties with well-maintained outdoor areas, and a patio can be the feature that sets your home apart. On average, homeowners recoup about 50% to 70% of their patio installation costs when they sell, but the real value is the everyday enjoyment you get from the space.
Beyond resale value, a patio reduces the wear and tear on your indoor flooring and carpeting. It creates a natural transition from inside to outside, making it easier to host gatherings and keep your home clean. It also helps with drainage, preventing water from pooling near your foundation, which can lead to costly structural issues. From a lifestyle perspective, a patio encourages you to spend more time outdoors, which is good for your physical and mental health.
Planning Your Patio Installation: Key Decisions First
Before you pick out pavers or schedule any excavation, you need to make a few fundamental decisions. These choices will affect the cost, timeline, and overall success of your project, so take your time and do your research.
Define the Purpose and Size
Start by asking yourself how you intend to use the patio. Is it for quiet morning coffee, large family barbecues, or a mix of dining and lounging? The answer will dictate the size and shape. A simple seating area for two might only need 100 square feet, while an outdoor kitchen and dining zone could require 300 square feet or more. As a rule of thumb, plan for at least 20 square feet per person you expect to host. Also, consider the path from your house to the patio; you want a smooth, direct route for carrying food and drinks.
Choose the Right Location
Location is everything. Ideally, the patio should be adjacent to the house, creating a seamless flow from the interior. But you also need to think about sun exposure, wind patterns, and privacy. If you live in a hot climate, you might prefer a spot that gets afternoon shade. In cooler regions, you might want to maximize sunlight. Check your local building codes and homeowners association rules for setback requirements and any easements that might restrict construction. Also, note where underground utilities run; you will need to call 811 before any digging.
Set a Realistic Budget
Patio installation costs vary widely based on materials, size, site conditions, and labor. On average, homeowners spend between $3,000 and $15,000 for a standard 200-square-foot patio, with most falling in the $5,000 to $10,000 range. High-end natural stone or custom designs can push costs above $20,000. To avoid surprises, get at least three written estimates from different contractors. This is where BuySellRemodel shines: you can submit one request and receive free, no-obligation quotes from multiple local pros, making it easy to compare prices and services.
Patio Materials: Comparing Your Options
The material you choose for your patio will define its look, durability, and maintenance needs. It will also be the largest line item in your budget. Here is a breakdown of the most popular choices:
- Concrete: Affordable, versatile, and long-lasting. Basic poured concrete costs around $6 to $10 per square foot, while stamped or colored concrete runs $10 to $18. It is low maintenance, but it can crack in freeze-thaw cycles if not properly installed.
- Pavers (concrete or brick): These interlocking units offer excellent durability and easy repair. Costs range from $10 to $20 per square foot installed. They come in a wide variety of shapes, colors, and patterns, making them a favorite for DIY and professional projects.
- Flagstone or Natural Stone: Premium choice with a timeless, organic look. Prices are $15 to $30 per square foot. Stone is very durable but requires a level base and may need periodic sealing.
- Gravel or Decomposed Granite: The most budget-friendly option, at $2 to $5 per square foot. It is easy to install and provides good drainage, but it shifts over time and is not ideal for dining areas or high heels.
- Tile (porcelain or ceramic): A stylish choice for covered patios. Installed costs are $8 to $20 per square foot. Tile is easy to clean, but it can be slippery when wet and may crack if not supported properly.
Each material has its trade-offs. Concrete is a workhorse, but it can look plain. Pavers are forgiving and easy to replace, but they require a sand base and edge restraints. Natural stone is beautiful, but it is expensive and needs more care. Think about your local climate, the style of your home, and how much maintenance you are willing to do. If you are unsure, a professional contractor can help you weigh the pros and cons based on your specific site.
The Patio Installation Process: Step by Step
Once you have finalized your design and selected a contractor, the installation process typically follows these steps. Understanding the sequence will help you communicate with your contractor and know what to expect.
Site Preparation and Excavation
The first step is to mark the patio area and excavate it to the required depth, usually 6 to 8 inches for a paver base. The crew will remove grass, soil, and any debris. If the ground is uneven, they may need to bring in fill dirt or gravel to create a level, compacted subgrade. This is also the time to address any drainage issues, such as sloping the area away from your house.
Base Layer and Compaction
For pavers and stone, a proper base is crucial. The contractor will lay down a layer of crushed stone (typically 4 to 6 inches) and use a plate compactor to tamp it down. This provides a stable foundation that prevents settling and shifting. For poured concrete, the crew will build forms and set a wire mesh or rebar for reinforcement, then pour and finish the concrete.
Installation of the Surface Material
If you are using pavers, each unit is placed by hand, following the chosen pattern. The contractor will make cuts at the edges to fit the shape of your patio. After all pavers are down, they will spread fine sand over the surface and sweep it into the joints, then compact the patio again to lock everything in place. For concrete, the crew will smooth and finish the surface, adding control joints to prevent random cracking.
Edge Restraints and Finishing Touches
To keep pavers from spreading, a plastic or metal edge restraint is installed around the perimeter. This is often hidden with soil or mulch. The contractor will then backfill any gaps with soil and clean the patio thoroughly. Depending on the material, they might apply a sealant to protect against stains and weather. Finally, they will walk you through the patio, review the work, and discuss any maintenance tips.
Hiring the Right Contractor: What to Look For
The success of your patio installation hinges on the skill of the contractor. A poor installation can lead to uneven surfaces, drainage problems, and premature failure, even with high-quality materials. That is why it pays to be thorough in your search.
Start by asking for recommendations from friends, family, and neighbors who have recently had similar work done. Then, use a platform like BuySellRemodel to expand your search. Our network includes vetted, experienced professionals who specialize in outdoor living projects. When you request a free estimate, you will get quotes from contractors who are familiar with local building codes and soil conditions.
Before you hire anyone, do these checks:
- Verify licenses and insurance: Ask for proof of a valid contractor's license, workers' compensation, and general liability insurance. This protects you if someone gets injured on your property.
- Read reviews and check references: Look at online reviews on Google, Yelp, and the Better Business Bureau. Ask the contractor for a list of past clients you can call.
- Get a detailed written contract: The contract should include the scope of work, materials, timeline, payment schedule, and warranty information. Never sign a blank contract or pay more than 10% upfront.
- Compare bids carefully: The lowest bid is not always the best. Look at what each contractor includes and excludes, such as excavation, disposal, and permits.
BuySellRemodel makes it easy to connect with multiple contractors at once. You can compare their profiles, read reviews, and choose the one that feels like the best fit for your project and budget. Remember, the goal is to find a pro who communicates clearly and values your input, not just someone who shows up and does the job.
Budgeting for Your Patio: Hidden Costs and Savings
Even with a solid estimate, unexpected costs can arise during patio installation. Common add-ons include the removal and disposal of old concrete, grading and compaction of poor soil, permits (which can cost $100 to $500), and upgrades like a fire pit or built-in seating. To keep your project affordable, consider these strategies:
- Get multiple quotes: This is the simplest way to avoid overpaying. BuySellRemodel provides free estimates from several contractors, so you can see the market rate.
- Phase your project: If your dream patio is out of reach right now, start with the basic pad and add features like lighting or a pergola later.
- Choose economical materials: Concrete and gravel are the most budget-friendly options, while pavers offer a good balance of cost and durability.
- Do some prep work yourself: You can save money by clearing the area of furniture, plants, and debris before the crew arrives. Just leave the heavy digging to the professionals.
- Schedule in the off-season: In many regions, contractors are less busy in early spring or late fall, and they may offer lower rates to fill their calendars.
Keep a contingency fund of 10% to 15% of your total project cost. This will cover any surprises, such as discovering a large rock or tree root during excavation. With a cushion, you will not have to compromise on quality if something unexpected comes up.
Maintenance and Longevity: Protecting Your Investment
A well-built patio can last 20 to 30 years, but it does require some upkeep. The maintenance routine depends on the material. Concrete should be sealed every few years to resist stains and moisture. Pavers need periodic re-sanding of joints and occasional weed removal. Natural stone may need to be resealed and cleaned with pH-neutral products.
Regular cleaning is simple: sweep regularly, rinse with a garden hose, and spot-clean spills promptly. In autumn, remove leaves and debris to prevent staining. In winter, avoid using deicing salts on concrete or pavers, as they can cause damage. Instead, use sand or kitty litter for traction.
If you notice any issues, such as cracks or settling, address them early to prevent larger problems. Most contractors offer a warranty on their workmanship, so if something fails within the warranty period, they will come back and fix it at no charge. Keep your contract and warranty information in a safe place.
Get Free Patio Installation Estimates Today
Ready to transform your backyard? The first step is to connect with qualified local contractors who can bring your vision to life. BuySellRemodel simplifies the process by matching you with experienced professionals in your area. You can request free, no-obligation estimates from multiple contractors, compare their bids, and choose the one that fits your budget and style.
Our platform is designed to make home improvement projects less stressful and more affordable. We do not do the work ourselves; we connect you with independent contractors who are vetted and committed to quality. Whether you need a small patio for a bistro set or a sprawling outdoor kitchen, we have the right pros for the job. Fill out a quick form on BuySellRemodel, and you will be one step closer to enjoying your new outdoor space.
Do not let the complexity of patio installation stop you from creating a backyard you love. With careful planning, the right materials, and a trustworthy contractor, your patio can be a source of pride and relaxation for years to come. Start your project today and see how easy it is to get the job done right.
Learn more about Patio Remodel or Addition for guides, costs, and what to expect.
Compare Patio Remodel or Addition Pros Near You
Enter your ZIP code to compare top-rated local professionals and request free quotes.