
Exterior Painting Prep Work Checklist Before Painters Start
Use this exterior painting prep work checklist before painters start to compare bids fairly. Call (833)-365-8755 for free local estimates.

By Amelia Reed
Learn more about Exterior Painting for guides, costs, and what to expect.
Compare Exterior Painting Pros Near You

Enter your ZIP code to compare top-rated local professionals and request free quotes.
Your exterior paint job will only last as long as the preparation underneath it. A crew that skips washing, scraping, or priming can leave you with peeling paint within two summers, and the worst part is that most homeowners do not know what to look for until the damage is done. The exterior painting prep work checklist before painters start is the single most useful document you can bring to a bid comparison, because it turns vague promises into line items you can verify. This guide breaks down exactly what proper prep looks like, how contractors price the messy parts like rot repair, and the questions that separate a thorough crew from a fast one.
Why Prep Work Decides Whether Your Paint Lasts Five Years or Fifteen
Paint is a film, and that film needs a stable, clean, dry surface to bond to. Chalking, mildew, failing caulk, and moisture trapped under old layers are the four most common reasons a fresh coat fails prematurely. When a crew power washes correctly, scrapes loose material, sands edges smooth, and applies the right primer, the topcoat adheres to a sound substrate instead of a crumbling one. When those steps are rushed, the new paint looks great for one season and then begins to blister or peel from the edges inward.
The financial math is stark. A full exterior repaint on a typical single-family home often runs into the thousands of dollars, and paying for that work twice within a decade wipes out any savings from choosing the cheaper bid. Prep quality is also the main variable that separates bids that look similar on paper. One contractor may quote a low number because washing and scraping are assumed to be minimal, while another includes full surface repairs and a primer coat. Understanding what prep should cost and why helps you compare fairly instead of defaulting to the lowest number.
If you want a baseline for what the finished project should cost in your market, our breakdown of exterior painting cost per square foot explains how prep, siding type, and number of stories affect the final price. Prep is rarely a fixed percentage; it scales with how much repair your particular house needs.
The Core Prep Steps Every Bid Should Include
A legitimate exterior painting prep work checklist before painters start covers five categories: cleaning, surface removal, sanding and feathering, priming, and caulking and sealing. Each one has a visible outcome you can inspect before the topcoat goes on. Ask your contractor to walk you through how each step will be handled on your specific siding, whether that is wood, fiber cement, stucco, or vinyl.
Here is the checklist in the order a professional crew typically performs it:
- Washing and mildew treatment: Power washing or hand washing removes dirt, chalk, pollen, and mildew. Mildew needs a dedicated treatment, not just water, or it will grow back through the new paint.
- Scraping and surface removal: All loose, flaking, and blistered paint gets scraped back to a sound edge. Glossy surfaces may need dulling so the new coat can grip.
- Sanding and feathering: Rough edges are sanded smooth so the repair does not show through the finish. This step also scuffs hard surfaces for adhesion.
- Priming: Bare wood, repaired areas, and stains get a primer coat matched to the surface. Primer is not optional on raw substrate.
- Caulking and sealing: Gaps around windows, doors, trim, and joints are caulked with paintable exterior sealant to keep water out.
Each step should appear in the written scope of work, not just in conversation. A bid that lists "prep and paint" as one line item gives you no way to know whether washing or priming is included. Ask for the prep steps to be itemized separately from the labor and materials for the topcoats.
Washing and Mildew Treatment
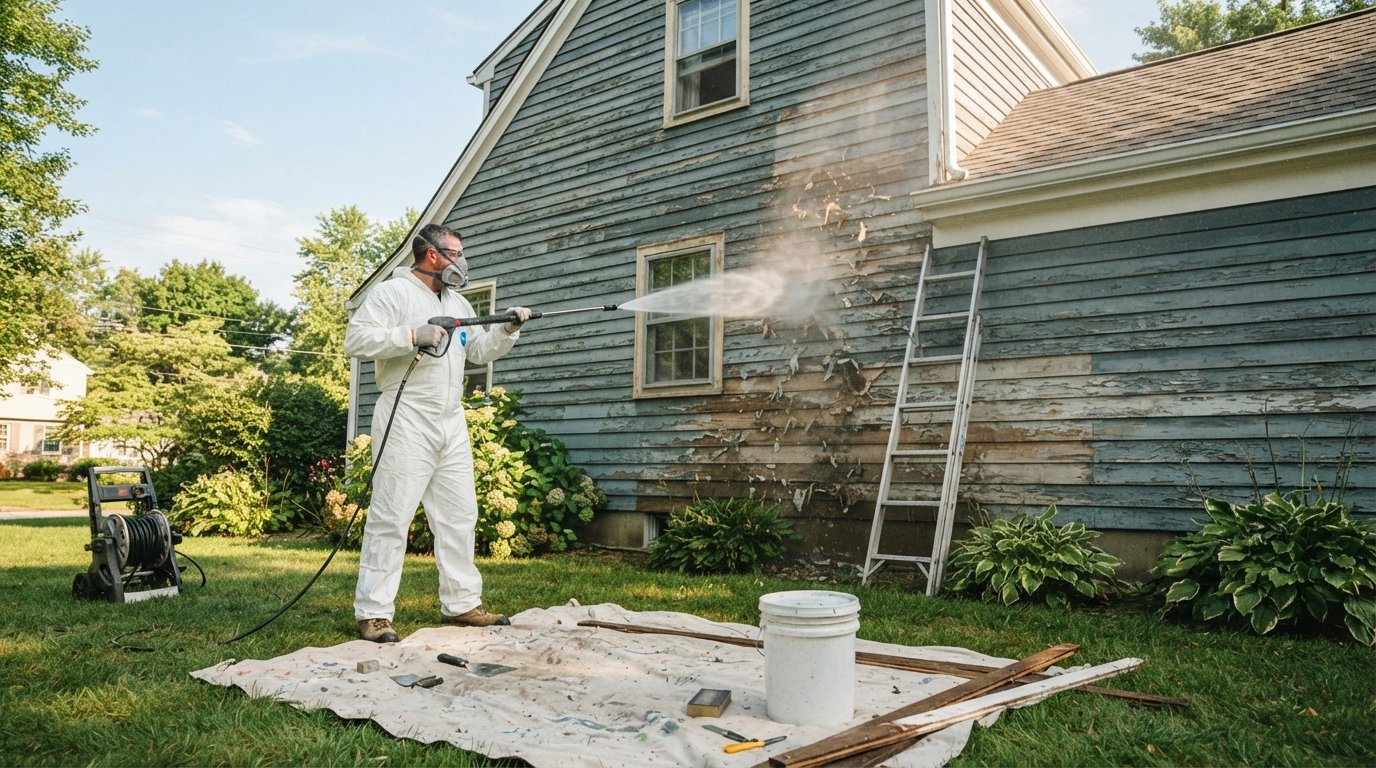
Dirt and chalk are bond breakers. A surface that looks clean can still carry a fine layer of chalked paint that prevents adhesion. Power washing removes this layer, but it must be done at the right pressure for the siding. Too much pressure on wood or fiber cement can gouge the surface and force water behind the cladding. Mildew, which often appears as gray or black streaking on north-facing walls, requires a bleach or commercial cleaner treatment and a thorough rinse before any scraping begins.
Ask how long the crew waits after washing before painting. Surfaces must be fully dry, and wood siding in particular can hold moisture for a day or more depending on weather. Painting over damp wood traps moisture and guarantees blistering.
Scraping, Sanding, and Feathering
Scraping removes the loose material, but the edge where old paint meets bare substrate must be feathered, meaning sanded down to a smooth transition. A hard, visible ridge will telegraph through the new paint and become a starting point for future peeling. This is detail work, and it is one of the first places a rushed crew cuts corners. On older homes, sanding and scraping also raise the question of lead paint, which requires certified handling if the home was built before 1978. A professional bid should ask about the age of your home and address lead-safe practices if needed.
Priming: The Step Homeowners Most Often Overpay to Skip
Primer does three jobs: it seals porous surfaces, it blocks stains from bleeding through, and it gives the topcoat a uniform surface to bond to. Bare wood, patched areas, and any spot sanded to the substrate need primer. So do knots in wood, which bleed tannins that stain light-colored paint. Some paint-and-primer-in-one products exist, but they do not replace a dedicated primer on raw or repaired surfaces. If a bid does not mention primer, ask directly whether bare spots and repairs will be primed.
Caulking and Sealing the Envelope
Caulking is where prep overlaps with weatherproofing. Gaps at window frames, door trim, corner boards, and siding joints let water in, and water is the enemy of paint adhesion. A thorough crew removes old, failing caulk before applying new paintable sealant. Smearing new caulk over old cracked caulk is a shortcut that fails within a year. Ask whether old caulk will be removed and whether the sealant used is paintable and rated for exterior use.
How Surface Repairs and Rot Get Priced
Prep is predictable up to a point. Washing, scraping, sanding, priming, and caulking can be estimated from a walkthrough. Rot repair is different because the damage is often hidden until the crew starts scraping. This is the single biggest source of surprise charges in exterior painting projects, and it is also where a fair contract protects you.
Most contractors handle rot in one of three ways: they include a small repair allowance in the bid, they price repairs hourly plus materials, or they stop work and issue a change order once damage is found. Each approach is legitimate if it is disclosed upfront. The problem is when a bid is silent on rot and the homeowner discovers the gap after work begins. Ask how the contractor handles unexpected damage and get the answer in writing.
Common repair items that show up on exterior prep lists include:
- Rotten siding boards, trim, and window sills that need replacement
- Wood filler and epoxy repairs for small soft spots
- Stucco patching and crack repair
- Replacing damaged fascia and soffit sections
- Treating or replacing wood that shows termite or moisture damage
Replacement materials are usually billed at cost plus a markup, and labor is billed hourly or by the repair. A reputable contractor will photograph the damage and show you before proceeding. If your home is older or has visible soft wood, budget a repair allowance of several hundred to a few thousand dollars depending on the scope, and treat any unused portion as savings.
Questions to Ask So Prep Is Not Skipped
The best defense against skipped prep is a short, direct conversation during the estimate. Contractors expect informed homeowners, and the questions below signal that you will be inspecting the work. A professional will welcome them. A crew that dodges them is telling you something.
Ask these questions before signing:
- Will you power wash, and how long will surfaces dry before painting?
- How do you handle mildew, and what product do you use?
- Will bare wood and repaired areas receive a dedicated primer?
- Is old caulk removed before new sealant is applied?
- How is rot repair priced, and will I see photos before work proceeds?
- What is the written schedule for prep versus painting, and what happens if it rains?
Also ask for the prep steps in writing, with the brand of primer and caulk specified. Vague scopes favor the contractor, not you. If you are comparing multiple bids, line them up side by side and check which ones include washing, priming, and caulk removal as separate items. The lowest bid often becomes the most expensive once missing prep is added back in.
Hiring the right crew matters as much as the checklist itself. A platform that connects homeowners with vetted local contractors, such as HomeRemodelingsContractors.com, can shorten the search and give you free estimates to compare, so you spend your time evaluating prep scopes instead of chasing callbacks. The same principle applies to any exterior project: clear scopes, written estimates, and contractors who explain their process.
How Prep Quality Affects Paint Lifespan and Your Budget
Paint manufacturers publish expected service life for their exterior products, often seven to ten years for quality acrylics on properly prepared surfaces. Those numbers assume correct prep. In practice, a well-prepped job frequently outlasts the estimate, while a poorly prepped job can fail in two to three years. The difference is not the paint brand; it is the adhesion layer underneath.
Think of prep as insurance on the paint investment. Spending a few hundred dollars more for thorough scraping, priming, and caulk replacement protects thousands of dollars of finish work. It also protects the substrate itself. Water that gets behind failing paint and caulk causes wood rot, and rot repair costs far more than prep ever will. Homeowners who plan to sell within a few years should weigh this carefully, since exterior condition is one of the first things buyers and inspectors notice.
A practical way to budget is to separate the bid into prep, repairs, and finish coats. Expect prep to be a meaningful share of the total, often a quarter to a third of the project on older homes with failing paint. If a bid shows prep as a token line item, ask why. The answer will tell you whether the crew plans to do the work or skip it.
Building Your Own Pre-Start Checklist
Before the crew arrives, walk your exterior and note the conditions that will affect prep: peeling areas, mildew streaks, soft wood, cracked caulk, and any spots where water pools or splashes. Clear landscaping, furniture, and fixtures away from the walls, and confirm with the contractor how windows, lights, and downspouts will be protected. Take photos of the exterior before work begins so you have a reference for the finished result.
On the day work starts, confirm that washing happens first and that surfaces are allowed to dry. Check that scraping and sanding are complete before primer goes on, and that primer covers bare spots rather than just the topcoat. Inspect caulk lines for removal of old material. These checkpoints take minutes and catch shortcuts early, while corrections are still cheap.
Exterior painting prep work checklist before painters start is ultimately a comparison tool. It lets you judge bids on what they actually include, ask better questions about rot and priming, and hold the crew to a written standard. A house painted over sound, clean, primed surfaces will look better and last longer, and you will know exactly what you paid for.