
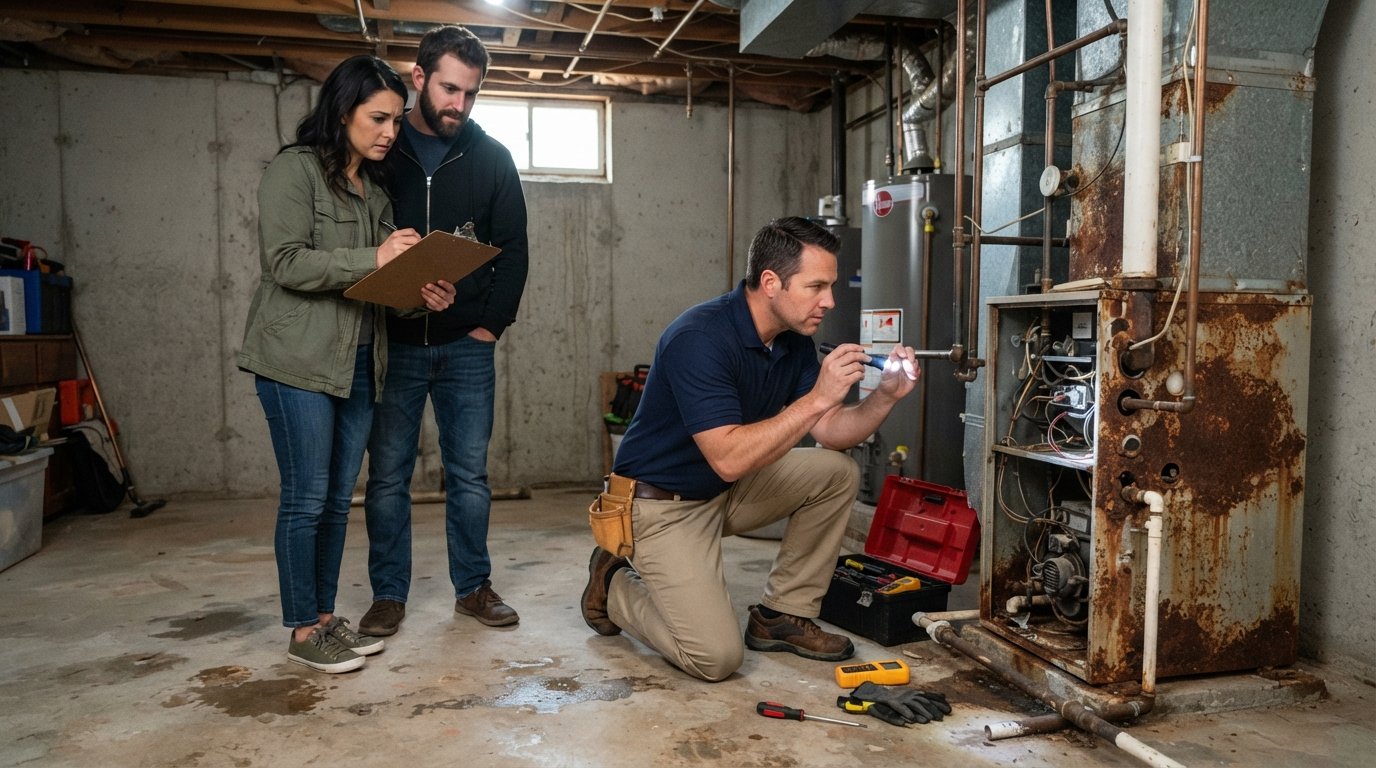
How to Budget for Unexpected Repairs After Home Inspection
A repair reserve and a three-tier budget turn inspection surprises into a clear plan. Learn how to budget for unexpected repairs after home inspection.

By Liam Weston
Learn more about Home Inspection for guides, costs, and what to expect.
Compare Home Inspection Pros Near You

Enter your ZIP code to compare top-rated local professionals and request free quotes.
You have found the house. The seller accepted your offer. Then the inspection report lands in your inbox, and suddenly the dream comes with a price tag you did not plan for: a failing HVAC system, a roof with three years left, a crawlspace that needs waterproofing. According to industry data, roughly 40 percent of home sales involve a buyer requesting repairs or credits after the inspection, and the median cost of those surprises often runs between $2,000 and $8,000. The question is not whether surprises will appear. The question is whether your budget can absorb them without derailing the purchase or leaving you house poor in the first year. This guide explains how to budget for unexpected repairs after home inspection, from building the right reserve before you make an offer to negotiating credits that protect your cash at closing. You will learn a practical framework for sizing your repair fund, prioritizing what truly cannot wait, and using contractor estimates to strengthen your position. By the end, you will have a repeatable process for turning inspection shock into a clear financial plan.
Start With a Repair Reserve, Not a Guess
Most buyers budget for the down payment, closing costs, and moving truck. Very few set aside a dedicated repair reserve, and that is why inspection findings feel like a crisis instead of a line item. A repair reserve is a separate pool of money, ideally 1 to 3 percent of the purchase price, earmarked for immediate fixes and the first year of ownership surprises. On a $400,000 home, that means $4,000 to $12,000 beyond your down payment. If that number sounds high, consider that a single HVAC replacement can run $6,000 to $12,000, and a roof replacement can exceed $15,000. The reserve is not pessimism. It is the financial buffer that keeps a small problem from becoming a credit card balance.
The reserve serves two purposes during the inspection window. First, it tells you how much you can self-fund if the seller refuses to negotiate. Second, it sets your walk-away threshold. If the inspection reveals $30,000 in needed repairs and you have $5,000 in reserve, you are not negotiating from strength. You are hoping. Knowing your number before the report arrives keeps emotion out of a decision that should be mathematical.
How you build the reserve depends on your timeline. If you are buying within six months, redirect bonuses, tax refunds, and any non-retirement savings into a high-yield account. If you have a year or more, automate a monthly transfer. Even $300 a month for twelve months creates a $3,600 cushion. The goal is not to cover every conceivable repair. The goal is to cover the most likely big-ticket items so you can negotiate the rest with confidence.
Read the Inspection Report Like a Budgeter
An inspection report is not a to-do list. It is a risk document, and not every item carries the same financial weight. Your first pass should separate findings into three buckets: safety hazards, systems at the end of their life, and cosmetic or maintenance items. Safety hazards include exposed wiring, gas leaks, missing handrails, and mold. These are non-negotiable because they affect insurability and habitability. Systems at the end of their life include roofs older than 20 years, HVAC units past 15 years, and water heaters past 10 years. These are your negotiation targets. Cosmetic items, such as peeling paint or a loose outlet cover, are usually yours to handle after closing.
Next, assign a rough cost range to every item in the first two buckets. You do not need contractor-grade precision yet. You need order of magnitude. A roof replacement is a five-figure item. A GFCI outlet is a three-figure item. A sewer line scope that reveals root intrusion is potentially a five-figure item. This exercise turns a 40-page report into a one-page budget sheet with a total range. That total range is the number you bring to the negotiation table.
Be careful with the phrase "as-is." Sellers who refuse repairs are not always refusing credits. Many will accept a price reduction or a closing cost credit instead, which keeps cash in your pocket and lets you manage the repair on your timeline. The distinction matters because a seller repair done quickly and cheaply is not always a repair done well. Credits give you control.
Build a Three-Tier Repair Budget
A single repair number is fragile. A three-tier budget is resilient. Tier one covers must-fix-now items: safety hazards, active leaks, and anything that makes the home uninsurable. Tier two covers should-fix-soon items: systems with one to three years of remaining life, drainage issues, and deferred maintenance that will worsen. Tier three covers nice-to-fix-eventually items: cosmetic updates, aging appliances that still function, and landscaping. By separating these tiers, you can decide what to negotiate, what to self-fund, and what to postpone without guilt.
Here is a practical way to structure the tiers with target percentages of your total repair budget:
- Tier 1 (50 to 60 percent): Safety, structural, and insurability items that must be resolved before or immediately after closing.
- Tier 2 (25 to 35 percent): Major systems nearing end of life, such as roof, HVAC, plumbing, and electrical upgrades.
- Tier 3 (10 to 20 percent): Cosmetic and comfort improvements you can phase over 12 to 24 months.
This allocation prevents the common mistake of spending the entire reserve on a kitchen refresh while the roof continues to age. It also gives you a defensible answer when a seller asks why you are requesting a specific credit. You are not asking for everything. You are asking for the Tier 1 and Tier 2 items that a lender or insurer will eventually require anyway.
For a deeper look at how remodeling costs break down across categories, the realistic home remodeling cost guide walks through line items that mirror what you will see in an inspection report. Use it to sanity-check your cost ranges before you send a repair request.
Turn Inspection Findings Into Negotiation Leverage
Negotiation is not about winning. It is about transferring risk. Every item in your Tier 1 and Tier 2 list represents a future expense. Your goal is to shift as much of that expense as possible to the seller through credits, price reductions, or completed repairs. The strongest requests come with documentation: a contractor estimate, a specialist report, or a code citation. A general inspector saying "roof is aging" is an opinion. A roofing contractor saying "this roof has two years left and will cost $14,000 to replace" is a number the seller can evaluate.
Prioritize your requests in this order:
- Health and safety items: These affect your ability to get insurance and occupy the home. Sellers rarely push back on documented safety issues.
- Active water intrusion: Moisture problems worsen quickly and can lead to mold. Request a credit or a licensed repair.
- Major systems at end of life: Roof, HVAC, electrical panel, and sewer line. Ask for a credit equal to a portion of replacement cost, not the full amount.
- Code compliance items: Unpermitted work or missing smoke detectors. These can block a loan or insurance policy.
If the seller refuses credits, ask for a price reduction instead. A price reduction lowers your loan amount and monthly payment, which improves your cash flow for future repairs. If the seller refuses both, you have a decision: absorb the cost with your reserve, or walk away. Walking away is not failure. It is the reserve doing its job by protecting you from a house you cannot afford to maintain.
One more lever: the home warranty. Sellers sometimes offer a one-year home warranty as a compromise. Treat it as a supplement, not a solution. Home warranties often exclude pre-existing conditions, which is exactly what an inspection report documents. Read the fine print before you count it as a win.
Fund the Gap Without Draining Your Savings
Even with a strong negotiation, you will likely face a gap between what the seller covers and what the repairs actually cost. How you fill that gap determines whether the first year of ownership feels stable or stressful. The least expensive option is a closing cost credit, because it reduces the cash you need at closing. The next option is a price reduction, which lowers your mortgage payment over time. Both are preferable to borrowing after closing.
If you must borrow, compare options carefully. A home equity line of credit (HELOC) uses your new home as collateral and often carries a lower rate than a personal loan, but it takes time to establish. A personal loan funds faster but costs more. A credit card should be a last resort for emergency repairs only, because the interest rate can turn a $5,000 repair into an $8,000 debt. If the repair is energy-related, such as an HVAC replacement or insulation, ask your contractor about utility rebates and federal tax credits. These programs can cover 10 to 30 percent of the cost and are frequently overlooked.
Another option is to phase the work. Tier 1 items happen immediately. Tier 2 items happen within six to twelve months as your reserve replenishes. Tier 3 items wait until year two. Phasing keeps your emergency fund intact and gives you time to get multiple bids, which almost always lowers the final price. The key is to write the phases down and attach target dates. A phased plan without dates becomes a permanent delay.
Choose Contractors Who Protect Your Budget
The best repair budget in the world fails if the contractor charges more than the estimate or disappears mid-project. Vetting matters as much as saving. Start by getting three written estimates for every Tier 1 and Tier 2 item. Verbal estimates are not budgets. Written estimates should include scope, materials, timeline, payment schedule, and warranty terms. If a contractor will not put it in writing, that is your answer.
When you compare bids, look beyond the bottom line. A bid that is 30 percent lower than the others often means excluded permits, substandard materials, or change-order surprises. Ask each contractor what is not included. The answers reveal more than the totals. Also verify licensing, insurance, and references for similar work completed in the last year. A contractor who specializes in the exact repair you need will usually cost less than a generalist learning on your dime.
If you would rather not manage the search alone, HomeRemodelingsContractors.com helps homeowners plan affordable home improvement projects and connect with experienced local contractors, covering remodeling, repairs, upgrades, and free estimates so you can compare options and move forward with confidence. That kind of matching service shortens the vetting process and gives you multiple bids without cold-calling a dozen companies.
Finally, hold back a contingency within your repair budget. Even the best estimate can miss hidden damage, such as rot behind siding or a cracked heat exchanger. A 10 to 15 percent contingency on top of your repair total absorbs those surprises without forcing you back to the bank. If the contingency goes unused, it rolls into your emergency fund, which is exactly where it belongs.
Keep the Budget Alive After Closing
The inspection window ends at closing, but the budgeting does not. Your first year of ownership will surface items the inspector could not see: a dishwasher that fails in month three, a garage door spring that snaps in month seven, a water heater that leaks in month ten. These are not negotiation items. They are ownership items, and they are why your reserve exists. Replenish the reserve monthly, even if the amount is small, so the next surprise does not become a crisis.
Track your actual repair spending against your three-tier plan. If Tier 1 came in under budget, move the surplus to Tier 2. If Tier 2 is running over, pause Tier 3. This is not micromanagement. It is the same discipline that successful homeowners use to avoid deferred maintenance, which is the single largest hidden cost of homeownership. A home that is maintained on a schedule costs less over ten years than a home that is repaired only in emergencies.
Review your reserve annually and adjust it based on the age of your systems. A home with a new roof and new HVAC needs a smaller reserve than a home with original systems from 2005. As systems age, increase the reserve. As you replace them, you can decrease it. This rhythm turns budgeting from a one-time exercise into a lifelong habit that protects your home and your peace of mind.
Inspection surprises are stressful, but they are also information. They tell you exactly where the financial risks are before you sign. With a repair reserve, a three-tier budget, documented contractor estimates, and a clear negotiation strategy, you can absorb those surprises without draining your savings or losing the home. The buyers who struggle are not the ones who face unexpected repairs. They are the ones who face them without a plan. Build the plan first, and the report becomes a roadmap instead of a roadblock.