
Bathroom Ventilation and Moisture Problems Homeowners Miss
Bathroom ventilation and moisture problems homeowners miss often start small. Call (833)-365-8755 for a free estimate on fan replacement and moisture fixes.

By Oliver Grant
Learn more about Fan Installation for guides, costs, and what to expect.
Compare Fan Installation Pros Near You

Enter your ZIP code to compare top-rated local professionals and request free quotes.
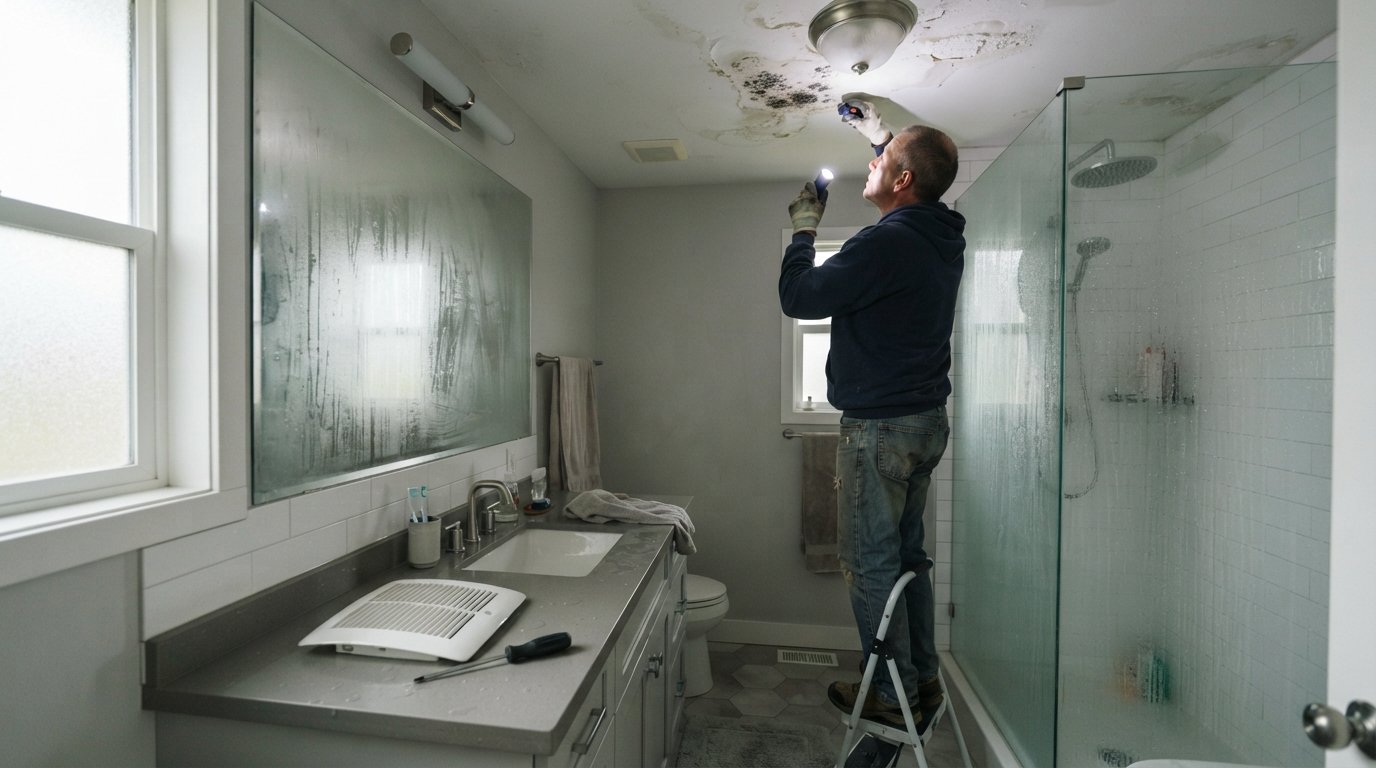
That stubborn patch of mold on the ceiling above your shower is not just a cleaning problem. The fogged mirror that stays cloudy for twenty minutes after you shower is not normal. The paint peeling near the light fixture is not simply a cosmetic issue. These are all symptoms of a deeper problem that many homeowners overlook: inadequate bathroom ventilation and the moisture damage it causes over time. According to the Home Ventilating Institute, a bathroom exhaust fan should completely exchange the room's air eight times per hour, yet many homes have fans that are undersized, improperly ducted, or simply not working at all. The result is a slow, invisible accumulation of moisture that damages drywall, breeds mold, rots framing, and can even compromise indoor air quality for your entire household.
What makes this issue so easy to miss is that the damage happens gradually. You do not see water pooling on the floor or dripping from the ceiling. Instead, you notice a faint musty smell that you attribute to a damp towel. You see a small bubble in the paint that you plan to fix later. You feel a little extra humidity when you walk in, but you shrug it off. By the time the problem becomes obvious, you may be looking at thousands of dollars in repairs that could have been prevented with a properly sized and correctly installed exhaust fan. This article will walk you through the specific ventilation and moisture problems that homeowners routinely overlook, from CFM sizing mistakes to duct routing errors, and it will show you how to identify, fix, and prevent these issues before they escalate.
CFM Sizing and Duct Routing Mistakes That Undermine Your Fan
The most common mistake homeowners make with bathroom exhaust fans is assuming that any fan will do the job. In reality, the effectiveness of a fan depends almost entirely on its CFM rating, which stands for cubic feet per minute. This number tells you how much air the fan can move out of the bathroom in one minute. The Home Ventilating Institute recommends a minimum of 1 CFM per square foot of bathroom floor space for bathrooms under 100 square feet. For larger bathrooms, you need to add additional CFM for each fixture, such as a shower, tub, or toilet. A typical 5 by 8 foot bathroom (40 square feet) needs at least a 40 CFM fan, but many builders install 50 CFM fans as a standard, which is fine for that size. The problem arises when homeowners replace a fan without checking the CFM rating, or when they install a fan that is too small for a larger bathroom.
But CFM is only half the story. The duct that carries the moist air from the fan to the exterior of your home must be sized correctly and routed properly. A fan rated at 110 CFM connected to a 3-inch duct will not move 110 CFM of air; the small duct creates back pressure that reduces airflow dramatically. Most manufacturers specify the minimum duct diameter for their fans, usually 4 inches or 6 inches for higher-capacity models. If the duct is too small, too long, or has too many bends, the fan will struggle to exhaust moisture effectively. Flexible foil duct, which is common in older homes, is especially problematic because its corrugated interior creates turbulence and traps lint, further reducing airflow over time.
Duct routing is another area where shortcuts cause major problems. The duct should run as straight and short as possible to the exterior. Every elbow, bend, or turn adds resistance. A duct that runs 20 feet with three elbows might reduce airflow by 30 percent or more. Ideally, the duct should terminate at a wall or roof cap with a backdraft damper, not in the attic, crawlspace, or garage. We will discuss the attic venting issue in detail later, but for now, understand that proper duct routing is just as important as the fan itself. If you are unsure about your current setup, a licensed HVAC or remodeling contractor can measure static pressure and verify that your fan is actually moving the air it claims to move. You can find experienced local contractors through platforms like HomeRemodelingsContractors.com, which helps homeowners plan affordable home improvement projects and connect with professionals who can diagnose and fix ventilation issues correctly.
Signs of Inadequate Ventilation You Should Never Ignore
Your bathroom is constantly telling you whether its ventilation is working. The challenge is that most homeowners do not know what to look for, or they dismiss the early warning signs as normal. Fogged mirrors are the most obvious indicator. A properly ventilated bathroom will clear a fogged mirror within a few minutes after a shower. If the mirror stays fogged for ten minutes or longer, your fan is not moving enough air. Similarly, if the walls and ceiling remain damp to the touch long after you have finished showering, the moisture is not being expelled.
Peeling paint and bubbling drywall are more serious signs. Paint peels when moisture migrates through the drywall and pushes the paint away from the surface. This is especially common on the ceiling above the shower and on the walls near the vanity. If you see paint peeling in these areas, the problem is not the paint itself; it is the moisture behind it. You may also notice a chalky white substance on the walls, which is efflorescence, a sign that water is moving through the drywall and depositing minerals on the surface. Musty odors are another clear indicator. A bathroom that smells damp or earthy even after cleaning likely has mold or mildew growing in hidden areas, such as behind the walls, under the floor, or inside the vent duct.
Here are the key warning signs that your bathroom ventilation is inadequate:
- Mirrors and windows stay fogged for more than five minutes after a shower.
- Paint peels, bubbles, or cracks on walls or ceilings, especially near the shower.
- A persistent musty or earthy odor that does not go away with cleaning.
- Visible mold or mildew growth on grout, caulk, or ceiling corners.
- Warped or soft drywall around the shower or toilet area.
- High humidity that makes the entire bathroom feel clammy for extended periods.
Each of these signs points to a ventilation system that is either undersized, clogged, improperly ducted, or completely broken. The longer you ignore them, the more extensive and expensive the damage becomes. Mold can begin growing within 24 to 48 hours of a moisture event, and once it establishes itself in drywall or framing, remediation requires removing and replacing affected materials. What started as a simple fan upgrade can turn into a full bathroom renovation if left unchecked.
Why Ducts Vented into Attics Cause Bigger Problems
One of the most damaging mistakes homeowners miss is a bathroom exhaust fan that vents directly into the attic instead of to the exterior. This is surprisingly common in older homes and even in some newer construction where builders cut corners. The logic seems harmless: the attic is already a ventilated space, so what is the harm in dumping a little moist air up there? The harm is significant. Attics are typically cool and poorly ventilated in winter, and when warm, moist air from the bathroom hits that cold environment, it condenses on the underside of the roof deck, on rafters, and on insulation. Over time, this condensation creates a perfect environment for mold and wood rot.
The consequences go beyond a musty attic. Moisture in the attic can soak insulation, reducing its R-value and increasing your heating and cooling costs. It can cause roof sheathing to delaminate and rot, leading to leaks and structural damage. In freezing climates, the moisture can refreeze and create ice dams at the roof edge, which can force water under shingles and into the living space below. In fact, venting a bathroom fan into the attic is a code violation in most jurisdictions because of these risks. The International Residential Code requires that bathroom exhaust be discharged directly to the outdoors, not into any attic, crawlspace, or other interior space.
If you suspect that your fan is venting into the attic, you should inspect the duct routing immediately. Look for a flexible duct that ends abruptly in the attic, often pointing toward a soffit vent or just lying on top of insulation. The fix is to extend the duct to a proper exterior termination, either through the roof or through a gable wall, with a backdraft damper to prevent outside air from entering. This is a job that requires cutting into the roof or siding, sealing the penetration properly, and ensuring the duct is insulated to prevent condensation. Because of the complexity and the risk of creating new leaks, it is best handled by a qualified contractor. A professional can also verify that the fan is sized correctly and that the duct run is as efficient as possible.
Fan Replacement Cost vs. Mold Remediation Cost: A Clear Comparison
Homeowners often hesitate to replace a bathroom exhaust fan because they view it as an unnecessary expense. But when you compare the cost of a fan replacement to the cost of mold remediation, the choice becomes obvious. A standard bathroom exhaust fan costs between $50 and $200 for the unit itself. If you hire a contractor to install it, including running new ductwork or upgrading the existing duct, the total project typically ranges from $300 to $800, depending on the complexity of the installation and local labor rates. If the existing duct is adequate and the electrical connection is already in place, the job can be done in a few hours.
Now consider the cost of mold remediation. According to the Environmental Protection Agency, mold can grow on any organic surface within 24 to 48 hours of water exposure. If your bathroom has been poorly ventilated for months or years, mold may have spread into the drywall, insulation, and framing. Professional mold remediation involves containing the affected area, removing and disposing of contaminated materials, treating the remaining surfaces with antimicrobial agents, and repairing the damaged drywall and paint. The average cost for mold remediation in a bathroom ranges from $1,500 to $6,000, and in severe cases involving structural damage, it can exceed $10,000. That does not include the cost of replacing tiles, vanities, or other finishes that may be damaged during the remediation process.
Here is a direct comparison of the two scenarios:
- Fan replacement: $300 to $800, completed in a few hours, prevents future moisture damage.
- Mold remediation (minor): $1,500 to $3,000, requires containment and material removal, may take several days.
- Mold remediation (major): $6,000 to $10,000 or more, involves structural repairs and restoration.
- Additional costs: Replacing damaged drywall, insulation, paint, and possibly flooring or cabinetry.
The math is clear. Spending a few hundred dollars now to ensure your bathroom is properly ventilated can save you thousands of dollars in remediation and repairs later. It also protects your health. Mold exposure can trigger allergic reactions, asthma attacks, and other respiratory issues, especially in children, the elderly, and individuals with compromised immune systems. If you are unsure whether your fan is working correctly, a free estimate from a local contractor can give you a clear picture of what needs to be done. Many contractors offer free assessments and can recommend the right fan and duct configuration for your bathroom size and layout.
Window-Only Ventilation Limits in Humid Climates
Some homeowners rely on opening a window to ventilate the bathroom instead of using a fan. While this can work in dry climates with low humidity, it is largely ineffective in humid climates and during certain seasons. When you open a window in a humid climate, you are inviting more moisture into the bathroom, not expelling it. The outdoor air may have a higher absolute humidity than the indoor air, which means the bathroom will actually become damper. This is especially true in the southeastern United States, along the Gulf Coast, and in other regions where summer humidity levels routinely exceed 70 percent.
Even in dry climates, window ventilation has limitations. It depends on the homeowner remembering to open the window every time they shower, and it requires that the window be positioned to allow cross-ventilation. In many bathrooms, the window is small, fixed, or located in a way that does not promote airflow. During winter, opening a window wastes heat and creates discomfort. At night or during inclement weather, it is not a practical option at all. For these reasons, building codes in most jurisdictions require mechanical ventilation in bathrooms, regardless of whether a window is present. A window is not a substitute for an exhaust fan; it is at best a supplement.
If you live in a humid climate and have been relying on window ventilation, it is time to install a proper exhaust fan. Look for a fan with a higher CFM rating and consider a model with a humidity sensor or timer, which will automatically run until the moisture level drops to a safe range. These features are especially useful for homeowners who forget to turn on the fan or who want to ensure it runs long enough after a shower. A humidity-sensing fan eliminates the guesswork and ensures consistent ventilation every time. For larger bathrooms or those with multiple moisture sources, a ducted system with an inline fan may be the best solution. A local contractor can help you choose the right system for your climate and bathroom layout.
How to Fix and Prevent Bathroom Moisture Problems
Fixing bathroom moisture problems starts with a thorough assessment of your current ventilation system. Begin by checking the fan's CFM rating and comparing it to the square footage of your bathroom. If the fan is undersized, replace it with a larger model. Next, inspect the ductwork. Ensure that it is the correct diameter for the fan, that it runs as straight as possible to the exterior, and that it terminates outside the home with a proper cap and damper. If the duct is flexible foil, consider replacing it with rigid or semi-rigid metal duct, which has a smoother interior and less resistance to airflow. Also, check that the duct is insulated in unconditioned spaces, such as attics, to prevent condensation.
In addition to upgrading the fan and duct, there are several habits and small upgrades that can reduce moisture levels in your bathroom. Run the fan every time you shower, and let it run for at least 15 to 20 minutes afterward to clear residual moisture. If your fan does not have a timer, consider installing one or upgrading to a model with a built-in timer or humidity sensor. Keep the bathroom door open when the fan is running to allow make-up air to enter, or install a door with a vent grille if the door fits tightly. Fix any leaks in the shower, tub, or sink promptly, and repair damaged grout or caulk to prevent water from seeping into walls. Use a squeegee on shower walls after each use to remove standing water, and wash towels and bath mats frequently to prevent mildew.
Finally, consider the role of your HVAC system. In some homes, the bathroom is connected to the central HVAC return, which can pull moist air into the system and distribute it throughout the house. This is not a substitute for a dedicated exhaust fan and can actually worsen indoor air quality. A qualified HVAC contractor can evaluate your system and recommend the best approach for your home. If you are planning a bathroom remodel or simply want to address moisture issues before they cause damage, connecting with experienced local contractors is the smartest first step. They can provide free estimates, explain your options, and ensure the work is done to code. Whether you need a simple fan replacement or a full ventilation overhaul, getting professional guidance will save you time, money, and stress.
Bathroom ventilation and moisture problems are easy to overlook because the damage happens slowly. But the signs are there if you know what to look for: fogged mirrors, peeling paint, musty odors, and high humidity. By understanding CFM sizing, duct routing, and the risks of attic venting, you can take action before small issues become major expenses. Replacing a fan is a minor investment compared to mold remediation, and in humid climates, a mechanical fan is not optional; it is essential. Take a few minutes today to check your bathroom fan. Listen to it, feel the airflow, and inspect the duct if you can. If something seems off, call a professional. Your home, your health, and your wallet will thank you.